
Day 5 : Advanced Linux Shell Scripting for DevOps Engineers with User management


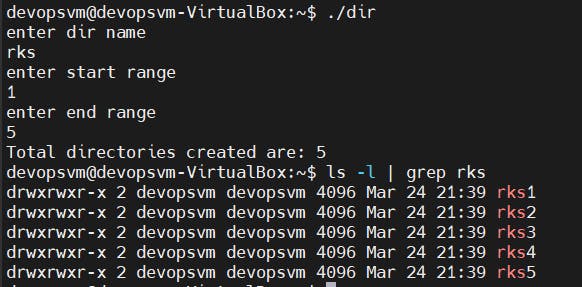
Task1 : Write a bash script to create directories.sh that when the script is executed with three given arguments (one is the directory name and second is start number of directories and third is the end number of directories ) it creates a specified number of directories with a dynamic directory name.
Example 1: When the script is executed as
./createDirectories.shday 1 90
then it creates 90 directories as day1 day2 day3 .... day90
Example 2: When the script is executed as
./createDirectories.shMovie 20 50 then it creates 50 directories as Movie20 Movie21 Movie23 ...Movie50
Script
#!/bin/bash
echo "enter dir name"
read name
echo "enter start range "
read s
echo "enter end range"
read e
count=0
for ((i=s;i<=e;i++))
do
mkdir "$name$i"
((count++))
done
o/p
Task2 : Create a Script to backup all your work done till now
As DevOps engineers, it's crucial to regularly back up our work and automate this process to minimize manual intervention. In the following script, we'll automate the backup procedure for our files and folders.
Script
#!/bin/bash
backup_date=date+'%d/%m/%y %H:%M:%S' #getting current date and time
#the destination where our file would be stored
destination=/home/devopsvm/myscripts/backup-$backup_date.tar.gz
#complete path of the file which needs to be saved
source=/home/devopsvm/dir
tar czf $destination $source #creating backup
echo "the backup is stored in $destination"
The tar czf command is used to create a compressed tar archive. Here's what each part of the command does:
tar: The command-line utility for archiving files.c: Stands for "create", indicating that you want to create a new archive.z: Stands for "gzip", indicating that you want to compress the archive using gzip compression.f: Stands for "file", indicating that the next argument specifies the name of the archive file.
So, when you run tar czf, you are telling tar to create a new archive file, compress it using gzip compression, and save it with the specified filename.
When we execute the above script , it will create the backup of source file in the destination we specified
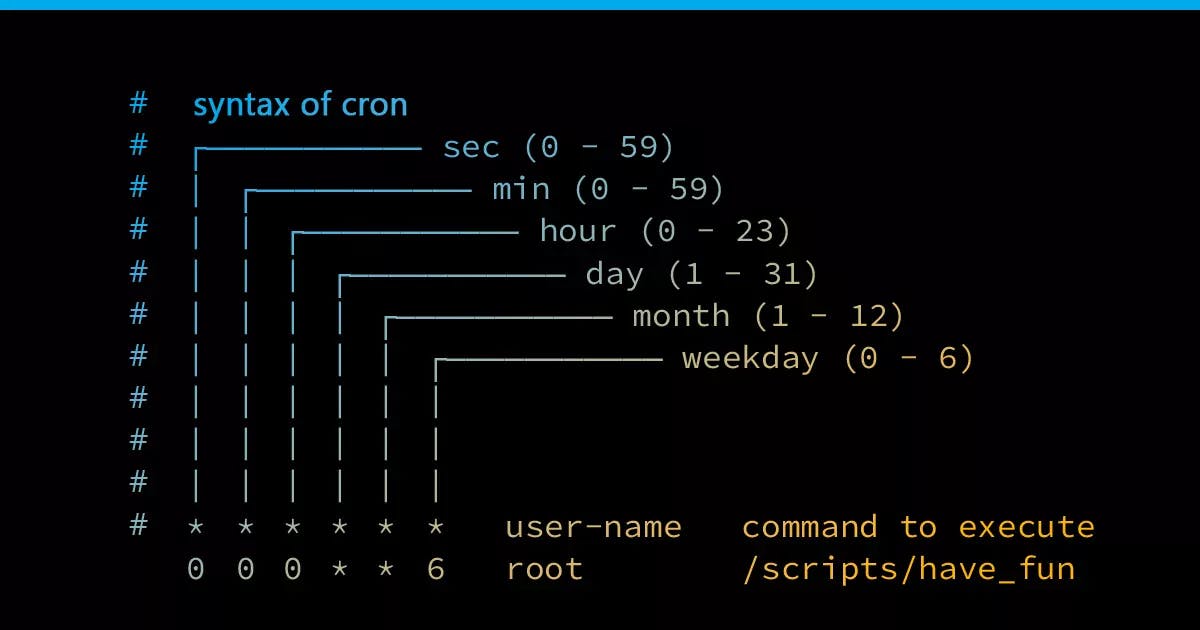
Task3 : Read About Cron and Crontab, to automate the backup Script
Cron:
Cron is a time-based job scheduler in Unix-like operating systems. It allows users to schedule tasks (known as cron jobs) to run periodically at fixed times, dates, or intervals. These tasks can be commands, shell scripts, or other executable programs.
Cron operates in the background and executes scheduled tasks without user intervention, making it a powerful tool for automating repetitive tasks such as backups, system maintenance, and data processing.
Crontab:
Crontab (short for cron table) is a file that stores cron jobs and their schedules. Each user on a Unix-like system can have their own crontab file, which contains the list of cron jobs they've scheduled.
The crontab command is used to create, edit, view, and delete crontab files. Users can use crontab -e to edit their own crontab file, crontab -l to view it, and crontab -r to remove it.
Crontab entries consist of the following fields:
In task 2 we had created a script which when executed will create a backup of the file mentioned in the script. But as a devops engineer we don't want to do it manually. What if there was a way in which it can be automated and run only during a specified date and time, that's where cron comes into picture. Using cronjob we can automated our backup script which will run only during the the mentioned time duration.
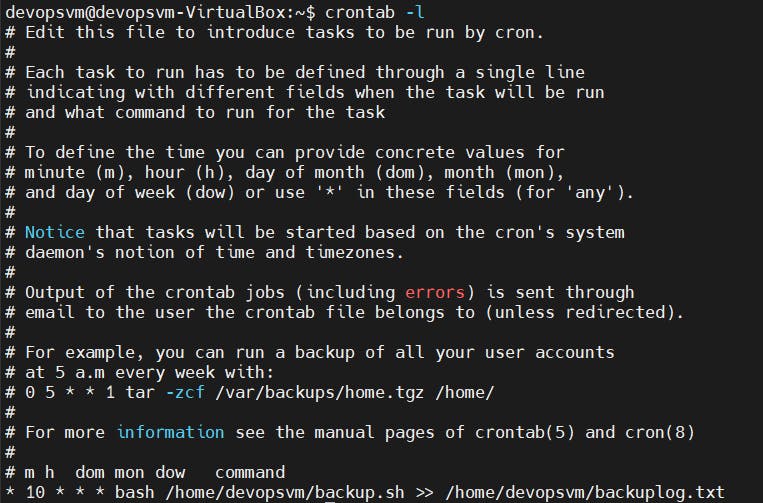
Now lets try to setup cronjob for the backup to be scheduled automatically
Commands used
crontab -l : It lists the crontab entries in your system

crontab -e : Edits the crontab
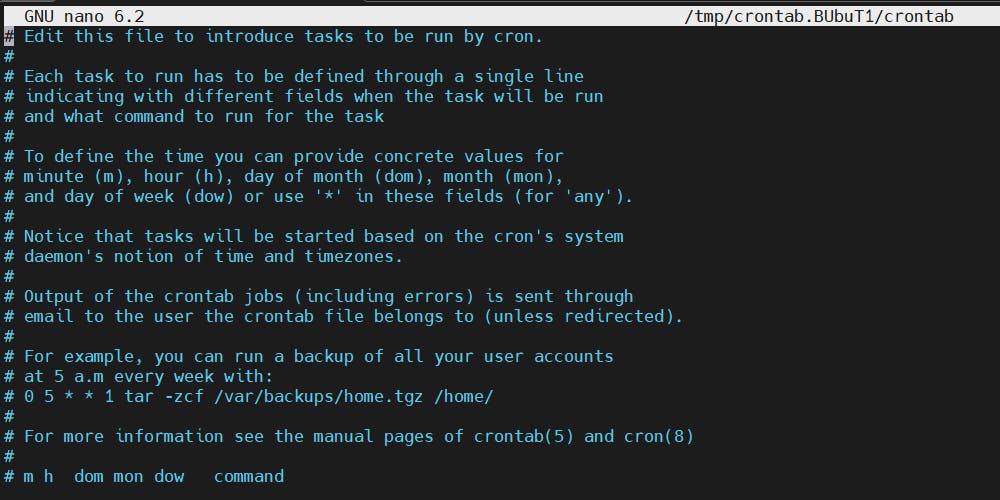
Below is the sample crontab editor file
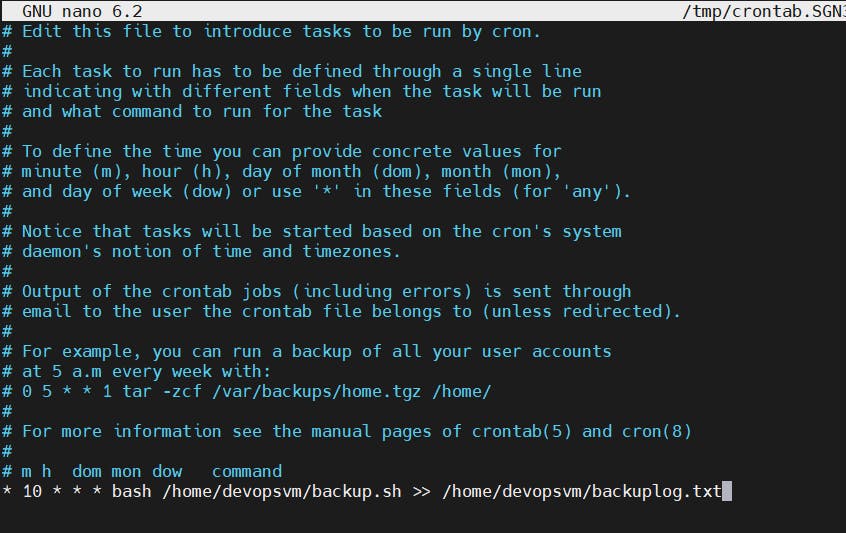
In the above example we have created a cron job which would run on every day of the month of every minute of 10 am and would append the o/p to file backuplog.txt
Here I have configured the cronjob to run everyday for testing, you can configure it on your requirement.
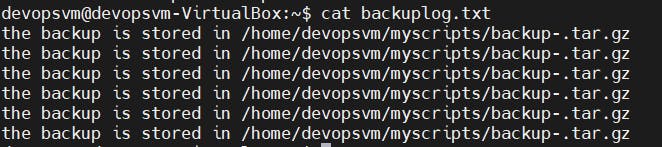
File getting added in backuplog.txt
crontab -l can be used to check the crontab configured on your system
You can comment out your cronjob by editing crontab entry using command crontab -e
Task4 : User Management in Linux
User management is a crucial aspect of Linux system administration, allowing administrators to control access, permissions, and resources on the system. Understanding the basics of user management is essential for maintaining system security and ensuring smooth operation. In this guide, we'll explore the fundamental concepts and commands related to user management in Linux.
User Accounts:
Every user on a Linux system is associated with a unique user account.
User accounts consist of a username and a unique numerical identifier called a User ID (UID).
User information, including username, UID, home directory, and default shell, is stored in the
/etc/passwdfile.
Creating Users:
The
useraddcommand is used to create new user accounts in Linux.Syntax:
sudo useradd usernameExample:
sudo useradd rahul
Deleting Users:
The
userdelcommand is used to delete user accounts from the system.Syntax:
sudo userdel usernameExample:
sudo userdel rahul
Modifying User Accounts:
The
usermodcommand allows administrators to modify user account attributes.Syntax:
sudo usermod [options] usernameExample:
sudo usermod -s /bin/bash rahul(Change the default shell for user 'rahul' to Bash)
User Password Management:
Users can set or change their passwords using the
passwdcommand.Syntax:
passwdExample:
passwd(Change the password for the current user)To force a password change on next login:
passwd --expire username
User Groups:
User accounts can be organized into groups to simplify access control and permissions management.
Group information is stored in the
/etc/groupfile.The
groupadd,groupdel, andgroupmodcommands are used to manage groups similar to user management commands.
Switching Users:
The
sucommand allows users to switch to another user account or the superuser account (root).Syntax:
su [username]Example:
su rahul(Switch to user 'rahul')